To complete an AWS Direct Connect setup, follow this sequence: select a Direct Connect location and port size, request a dedicated or hosted connection, download the LOA-CFA, hand it to your colocation provider or partner to order the cross-connect, create your virtual interfaces (private, public, or transit), configure BGP on your router, and verify the session is established. That’s the full arc. Start right now by opening the AWS Direct Connect console and running the Connection wizard, or fire this CLI command to list available locations:
aws directconnect describe-locations
Quick-start checklist for your runbook:
- Select a Direct Connect location close to your on-premises facility and confirm available port speeds
- Request a dedicated connection via the Connection wizard (or Classic flow) or contact an APN partner for a hosted connection
- Download the LOA-CFA from the console or CLI and send it to your colo or carrier
- Wait for cross-connect confirmation, then create your virtual interface(s) with the correct VLAN, ASN, and BGP peer IPs
- Apply the downloaded router configuration on your Cisco, Juniper, or Arista device and bring up BGP
- Verify virtual interface state and BGP neighbor status in the console and on the router
Key Takeaways
A complete AWS Direct Connect setup requires physical coordination (LOA-CFA, cross-connect), logical configuration (VIF type, VLAN, BGP), and resiliency planning before the first port is ordered.
| Point | Details |
|---|---|
| LOA-CFA is the critical path | Download it immediately after connection approval and call the colo NOC to confirm receipt and get a ticket number. |
| Choose VIF type before creating | Private VIF for VPC access, public VIF for AWS services, transit VIF for multi-VPC via Transit Gateway. |
| Resiliency must be planned upfront | Order two connections at separate locations during initial provisioning; retrofitting redundancy disrupts production. |
| Router config is a template | The AWS-generated config covers BGP basics; you must add MTU, route filters, and BFD timers for production use. |
| IT-Magic accelerates deployment | As an AWS Advanced Tier Partner, IT-Magic provides end-to-end Direct Connect provisioning and resiliency design. |
Table of Contents
- What you need before starting the AWS Direct Connect setup
- How to pick your Direct Connect location, port size, and connection type
- How to order your connection: console wizard, LOA-CFA, and cross-connect
- What virtual interface type do you need?
- How to configure your router and bring up BGP
- How do you design for resiliency from day one?
- How to verify your connection and fix common problems
- What does AWS Direct Connect cost, and how long does provisioning take?
- Copy/paste CLI commands and final setup checklist
- The part of Direct Connect setup most guides skip
- Production-grade Direct Connect without the trial and error
- Sources
- FAQ
What you need before starting the AWS Direct Connect setup
Getting these prerequisites wrong is the most common reason provisioning stalls. Gather everything below before you touch the console.
1. AWS account permissions
Your IAM identity needs the directconnect:* action set at minimum. For production environments, scope it tighter: directconnect:CreateConnection, directconnect:DescribeLoa, directconnect:CreatePrivateVirtualInterface, directconnect:CreateTransitVirtualInterface, and directconnect:DescribeVirtualInterfaces. If you plan to associate a Direct Connect gateway, add ec2:CreateVpnGateway and ec2:AttachVpnGateway permissions. Confirm your role has these before requesting the port.
2. Physical and fiber requirements
The Direct Connect user guide specifies single-mode fiber for all dedicated port speeds, with the transceiver type varying by capacity:
- 1 Gbps: 1000BASE-LX (1310 nm) transceiver
- 10 Gbps: 10GBASE-LR (1310 nm) transceiver
- 100 Gbps: 100GBASE-LR4 transceiver
- 400 Gbps: 400GBASE-LR4 transceiver
Auto-negotiation must be disabled on your router port. This trips up Cisco engineers who leave it on by default.
3. Router and logical requirements
Your edge router must support:
- 802.1Q VLAN encapsulation (dot1q tagging on subinterfaces)
- BGP (eBGP or iBGP depending on your ASN choice)
- BGP MD5 authentication (required, not optional)
- BFD (Bidirectional Forwarding Detection) — optional but strongly recommended for fast failover
- MTU of at least 1500 bytes; jumbo frames up to 9001 bytes are supported on private and transit VIFs if your router and VPC are configured to match
4. Operational prerequisites
Before you order, have these ready:
- Contact information for your colocation facility or APN partner (they receive the LOA-CFA)
- Your BGP ASN: use a public ASN if you own one, or use a private ASN in the 64512–65534 range
- A /30 subnet from RFC 1918 private space for BGP peer IPs on private VIFs (e.g., 169.254.x.x link-local is valid for AWS-assigned addresses but avoid it for your own assignments)
- VLAN ID planned (1–4094, unique per VIF on the physical port)
- The VPC ID or Transit Gateway ID you plan to attach the VIF to
How to pick your Direct Connect location, port size, and connection type
The physical decision you make here shapes your cost, resiliency, and operational complexity for years. Get it right before you click “Create.”
Dedicated vs. hosted vs. LAG
A dedicated connection gives you a physical port at a Direct Connect location, with speeds of 1, 10, 100, or 400 Gbps. You own the port, you control the VLANs, and you can run multiple VIFs over it. This is the right choice when you need sustained throughput above 1 Gbps, want MACsec encryption at the Ethernet layer, or have compliance requirements that demand a physically dedicated circuit.
A hosted connection comes through an APN partner who owns the port and carves out a slice for you. Bandwidth options range from 50 Mbps up to 25 Gbps depending on the partner. The tradeoff: faster provisioning, lower entry cost, but you share the physical port and lose some control. Good for teams that need connectivity quickly or have variable bandwidth needs below 1 Gbps.
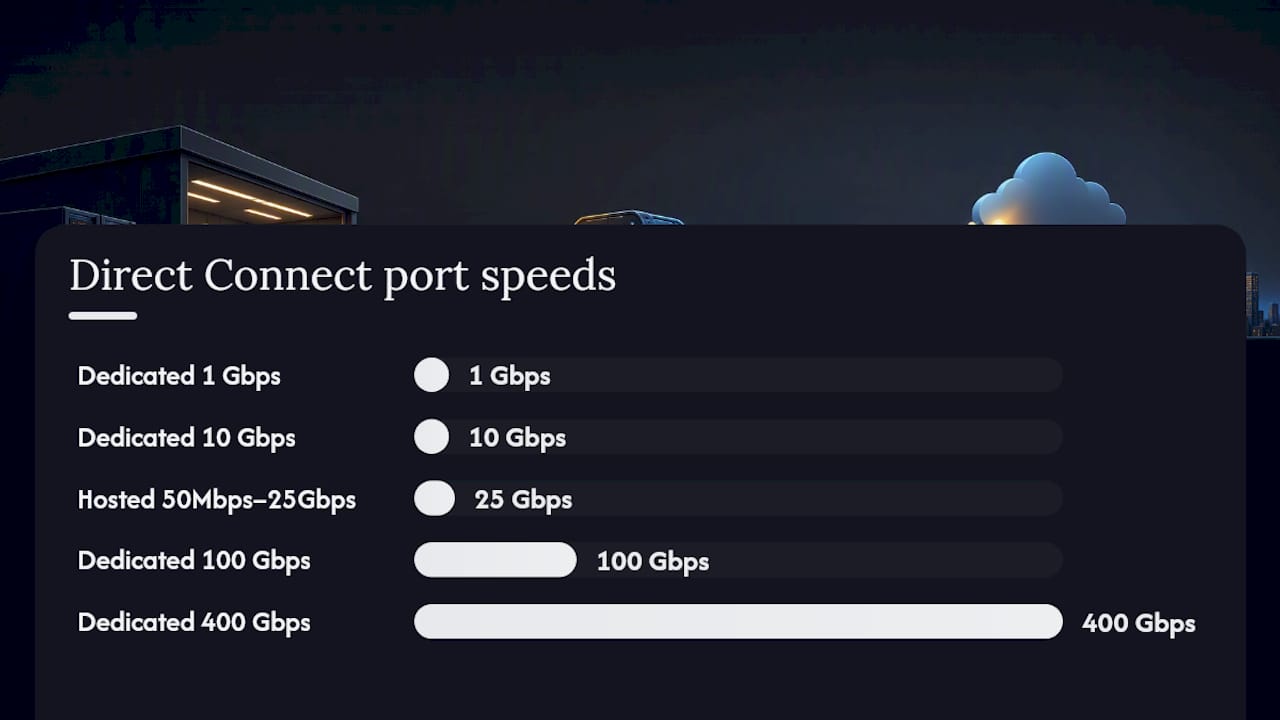
A Link Aggregation Group (LAG) bundles multiple dedicated ports into a single logical interface. Use a LAG when you need more than 100 Gbps of aggregate throughput, want port-level redundancy within a single location, or need to simplify management of multiple physical connections. Per AWS re:Post guidance, LAGs also support MACsec on dedicated ports.
Port speed selection signals
- Sustained transfer needs above 1 Gbps: go dedicated, 10 Gbps minimum
- Large data migration (petabyte-scale): 100 Gbps dedicated or LAG
- Bursty or unpredictable workloads under 1 Gbps: hosted connection through a partner
- Multi-region with centralized connectivity: dedicated + Transit Gateway association
Location selection checklist
- Choose the Direct Connect location geographically closest to your on-premises data center to minimize latency
- Confirm your preferred port speed is available at that location (not all speeds are at every facility)
- Check whether your colocation provider has a meet-me room at that facility, or whether you need a carrier to extend the circuit
- If you need dual-location resiliency, identify a second Direct Connect location in a different physical building
How to order your connection: console wizard, LOA-CFA, and cross-connect
This is where most teams lose time. The LOA-CFA is the single most frequent bottleneck in the entire process.
Step 1: Choose your ordering flow
The Connection wizard is the current recommended path. It walks you through resiliency level selection (Maximum, High, or Development and Test), port speed, location, and optionally MACsec. It also shows estimated port costs before you commit. Use the Classic flow only if you have a specific reason — the wizard covers all the same options with better guardrails.
Step 2: Request the connection in the console
- Open the AWS Direct Connect console and choose “Create connection”
- Select “Connection wizard” and choose your resiliency level
- Select the Direct Connect location and port speed
- Optionally check “Request a MACsec-capable port” for dedicated connections
- Review the estimated monthly port cost shown on the confirmation screen
- Submit the request
Step 3: Download the LOA-CFA
Once AWS provisions the port (typically within minutes to a few hours for the initial request), download the Letter of Authorization and Connecting Facility Assignment:
- Console: navigate to your connection, choose “Download LOA-CFA”
- CLI:
aws directconnect describe-loa --connection-id dxcon-XXXXXXXX --output text --query loaContent | base64 --decode > loa.pdf
The LOA-CFA contains the AWS cage and patch panel details, the port identifier, and the authorization for the colo to complete the cross-connect. Per the Classic connection guide, this document must be provided to your colocation provider or partner to order the physical cross-connect.
Step 4: Order the cross-connect
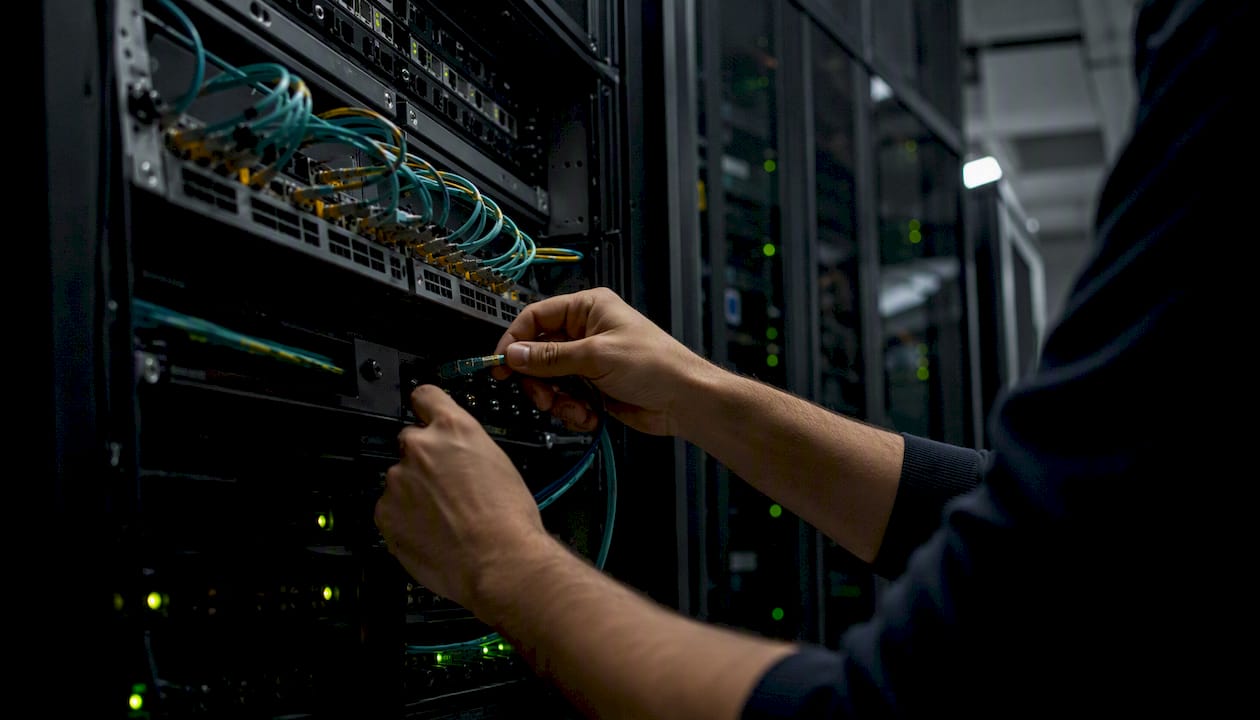
- If your equipment is already in the Direct Connect facility: contact the colo’s NOC directly with the LOA-CFA and request a cross-connect to the AWS cage
- If you’re connecting through a carrier or partner: send the LOA-CFA to your APN partner; they handle the physical layer
- Typical cross-connect fulfillment: 3–10 business days at most major facilities, though some colo providers complete it in 24–48 hours
Step 5: Confirm and wait
After submitting the LOA-CFA, the connection status in the console moves from “Requested” to “Pending” and then “Available” once the cross-connect is complete and the optical signal is detected. If AWS requests additional information, plan for up to a 7-day response window before the LOA-CFA is issued.
What virtual interface type do you need?
AWS Direct Connect supports three VIF types, each routing to a different target. Choosing the wrong one is a configuration mistake that requires tearing down and recreating the VIF.
| VIF Type | Primary Use Case | Routing Target | Key Constraint |
|---|---|---|---|
| Private VIF | Access resources in a specific VPC | Virtual Private Gateway or Direct Connect Gateway | One VPC per VGW; use DX Gateway for multi-VPC |
| Public VIF | Access AWS public services (S3, DynamoDB, etc.) | AWS public IP space | Must advertise public prefixes; requires route filter |
| Transit VIF | Access multiple VPCs via Transit Gateway | AWS Transit Gateway | Requires Direct Connect Gateway association |
Required fields for every VIF
- VLAN ID: any value from 1 to 4094, unique per VIF on the physical port
- BGP ASN: your on-premises ASN (public or private 64512–65534)
- Customer IP: one address from a /30 subnet (your side of the BGP session)
- Amazon IP: the other address from the same /30 (AWS side)
- BGP auth key: MD5 string, required
Example private VIF values
VLAN: 100
Customer ASN: 65001
Customer IP: 192.168.100.1/30
Amazon IP: 192.168.100.2/30
BGP Auth Key: MyMD5Key123
Use RFC 1918 private address space for the /30 peer IPs on private VIFs. For public VIFs, AWS assigns the peer IPs from its own public range.
Additional notes
- You can run multiple VIFs on a single physical port, each with a different VLAN
- A Direct Connect gateway lets one private VIF reach multiple VPCs across regions — far more flexible than a per-VPC virtual private gateway
- Transit VIF quotas apply: check your account’s Direct Connect gateway association limits before designing a large hub-and-spoke topology
How to configure your router and bring up BGP
Once the connection is “Available” and your VIF is created, the router configuration is what stands between you and a working BGP session.
Step 1: Download the router configuration
AWS generates a device-specific config snippet for your VIF. Get it from the console (navigate to your VIF and choose “Download router configuration,” then select your vendor and platform) or via the AWS CLI:
aws directconnect describe-virtual-interfaces
  --virtual-interface-id dxvif-XXXXXXXX
  --query 'virtualInterfaces[0].customerRouterConfig'
  --output text
The customerRouterConfig field contains the subinterface definition, VLAN encapsulation, BGP neighbor statement, MD5 key, and route advertisement block pre-filled with your VIF values.
Step 2: Apply vendor-specific configuration
Cisco IOS/IOS-XE
interface GigabitEthernet0/0.100
 encapsulation dot1Q 100
 ip address 192.168.100.1 255.255.255.252
 ip mtu 1500
!
router bgp 65001
 neighbor 192.168.100.2 remote-as 7224
 neighbor 192.168.100.2 password MyMD5Key123
 neighbor 192.168.100.2 soft-reconfiguration inbound
Watch the MTU setting. Cisco subinterfaces inherit the physical interface MTU, but you must explicitly set ip mtu on the subinterface if you want jumbo frames (9001 bytes). Also confirm no negotiation auto on the physical interface.
Juniper JunOS
set interfaces xe-0/0/0 unit 100 vlan-id 100
set interfaces xe-0/0/0 unit 100 family inet address 192.168.100.1/30
set protocols bgp group AWS neighbor 192.168.100.2 authentication-key MyMD5Key123
set protocols bgp group AWS neighbor 192.168.100.2 peer-as 7224
On Juniper, confirm family inet is set on the unit and that the physical interface has flexible-vlan-tagging enabled. MTU on Juniper is set at the physical level with mtu 9192 if you want jumbo support.
Arista EOS
interface Ethernet1.100
 encapsulation dot1q vlan 100
 ip address 192.168.100.1/30
!
router bgp 65001
 neighbor 192.168.100.2 remote-as 7224
 neighbor 192.168.100.2 password MyMD5Key123
Arista defaults to auto-negotiation on most interfaces. Disable it explicitly with no speed auto on the parent interface. Jumbo MTU requires mtu 9214 at the interface level.
Step 3: Avoid link-local addressing on BGP peer links
RFC 3927 defines link-local IPv4 behavior (169.254.0.0/16). While AWS does assign peer IPs from the 169.254.x.x range for some configurations, avoid using self-assigned link-local addresses for your BGP peer links in production. Use a proper /30 from RFC 1918 space or the AWS-assigned addresses from your VIF configuration.
Step 4: Verify BGP
# Cisco
show bgp summary
show interfaces GigabitEthernet0/0.100

# Juniper
show bgp summary
show interfaces xe-0/0/0.100

# Arista
show bgp summary
show interfaces Ethernet1.100
BGP should reach “Established” within a minute of applying the config if the VLAN, peer IPs, ASN, and MD5 key all match the VIF settings.
How do you design for resiliency from day one?
Retrofitting redundancy into a production Direct Connect environment is painful. Plan the resiliency architecture before you order the first port.
AWS recommends using the Direct Connect Resiliency Toolkit to implement multiple connections across locations and eliminate single points of failure, particularly for high-load and regulated environments.
Resiliency levels in the Connection wizard
- Maximum Resiliency: two connections at two separate Direct Connect locations, each in a different physical facility. Highest SLA, highest cost.
- High Resiliency: two connections at a single location but in separate devices. Protects against device failure, not facility failure.
- Development and Test: single connection, no redundancy. Acceptable for non-production only.
Design patterns
- Active/active dual-location: two connections at two locations, both carrying traffic. BGP load-balancing distributes flows. Best for maximum throughput and availability.
- Active/passive dual-location: primary connection carries all traffic; secondary is on standby with a lower BGP local-preference. Simpler to operate, slightly less efficient.
- LAG within a location: multiple physical ports bundled into one logical interface. Protects against port failure, not location failure. Combine with a second location for full redundancy.
- Transit Gateway pattern: one Direct Connect gateway associated with a Transit Gateway, with two connections from separate locations. Gives you multi-VPC and multi-region reach without per-VPC VGW associations.
Resiliency checklist
- Order connections at two physically separate Direct Connect locations
- Confirm the two locations are in different buildings (not just different cages in the same facility)
- Enable BFD on both connections for sub-second failover detection
- Test failover by taking one connection down and verifying traffic shifts within your target RTO
- For regulated environments (fintech, healthcare), document the resiliency test results for compliance evidence
Pro Tip: Most teams test failover once during commissioning and never again. Schedule a quarterly failover drill. BGP timers drift, route filters change, and the passive connection you haven’t touched in six months is the one that fails to take over when you need it.
For a deeper look at cloud resilience design patterns that apply beyond Direct Connect, the IT-Magic team has published a practical guide for IT teams.
How to verify your connection and fix common problems
A BGP session that shows “Established” in the console is not the same as a working connection. Run these checks before you declare the circuit live.
Step 1: Console and CLI verification
# Check virtual interface state
aws directconnect describe-virtual-interfaces
  --virtual-interface-id dxvif-XXXXXXXX

# Check connection state
aws directconnect describe-connections
  --connection-id dxcon-XXXXXXXX
Look for virtualInterfaceState: available and connectionState: available. If either shows down or verifying, the physical layer or BGP has not completed.
Step 2: Common failure modes and fixes
-
LOA-CFA not applied: connection stays in “Requested” state. Fix: confirm the colo received the LOA-CFA and submitted the cross-connect order. Follow up with the colo NOC directly.
-
Wrong VLAN ID: BGP never comes up, no optical errors. Fix: compare the VLAN in your router subinterface config against the VLAN shown in the VIF details in the console. They must match exactly.
-
BGP MD5 mismatch: BGP stays in “Active” or “Idle” state. Fix: re-enter the MD5 key on both the router and the VIF (update via console or
aws directconnect update-virtual-interface-attributes). -
Wrong peer IPs: BGP attempts fail with “no route to host.” Fix: verify the customer IP and Amazon IP in the VIF settings match what’s configured on the router subinterface.
-
MTU mismatch: BGP establishes but large packets are dropped. Fix: set the interface MTU to match on both sides. For jumbo frames, confirm the VPC and the router both support 9001 bytes end-to-end.
Step 3: Test connectivity to VPC resources
After BGP is established, ping a private IP in your VPC from your on-premises host. If ping fails despite BGP being up, check:
- Security group rules on the target EC2 instance (allow ICMP from your on-premises CIDR)
- Route table in the VPC subnet (the route to your on-premises CIDR must point to the VGW or TGW)
- Route advertisement from your router (confirm you’re advertising your on-premises prefix to AWS via BGP)
For secure access to EC2 instances after the connection is live, review the enterprise SSH guide for additional validation steps.
What does AWS Direct Connect cost, and how long does provisioning take?
Billing elements
Direct Connect billing has two components. Port-hours are charged based on the port capacity you’ve reserved, billed from the moment the connection is created regardless of traffic. Outbound data transfer charges apply when data leaves AWS toward your on-premises network over the Direct Connect connection. Per AWS documentation, for private and transit VIFs, data transfer charges are allocated to the AWS account responsible for the egress.
Dedicated connections carry a higher port-hour rate than hosted connections but typically offer lower per-GB data transfer rates at high volumes. For workloads moving large amounts of data out of AWS regularly, a dedicated connection often pays for itself compared to internet egress pricing. See the cost optimization breakdown for a detailed comparison of egress cost scenarios.
| Billing Element | Dedicated Connection | Hosted Connection |
|---|---|---|
| Port-hours | Charged by capacity (1G/10G/100G/400G) | Charged by partner; varies by provider |
| Outbound data transfer | AWS Direct Connect rate (lower than internet) | AWS Direct Connect rate |
| Cross-connect fee | Charged by colo facility (separate invoice) | Typically included by partner |
Typical provisioning timeline
- Connection request to LOA-CFA generation: minutes to a few hours (up to 7 business days if AWS requests more information)
- LOA-CFA submission to colo cross-connect completion: 3–10 business days at most facilities; some complete in 24–48 hours
- Cross-connect complete to circuit turn-up (optical signal detected): same day in most cases
- VIF creation and BGP establishment: 15–30 minutes after router config is applied
Procurement checklist
- Confirm the colo cross-connect fee is on your facility invoice, not your AWS bill
- Set a billing alert for Direct Connect port-hours in AWS Cost Explorer
- Delete connections you no longer use — port-hours accrue even on idle connections
- For AWS cost optimization across your full environment, review port sizing against actual throughput quarterly
Copy/paste CLI commands and final setup checklist
Key AWS CLI commands
# List available Direct Connect locations
aws directconnect describe-locations

# Create a dedicated connection
aws directconnect create-connection
  --location "EqDC2"
  --bandwidth "10Gbps"
  --connection-name "prod-dc-primary"

# Download LOA-CFA (replace connection ID)
aws directconnect describe-loa
  --connection-id dxcon-XXXXXXXX
  --output text
  --query loaContent | base64 --decode > loa.pdf

# Create a private virtual interface
aws directconnect create-private-virtual-interface
  --connection-id dxcon-XXXXXXXX
  --new-private-virtual-interface
    virtualInterfaceName=prod-private-vif,
    vlan=100,
    asn=65001,
    authKey=MyMD5Key123,
    amazonAddress=192.168.100.2/30,
    customerAddress=192.168.100.1/30,
    virtualGatewayId=vgw-XXXXXXXX

# Verify virtual interface status
aws directconnect describe-virtual-interfaces
  --virtual-interface-id dxvif-XXXXXXXX
The location code (e.g., EqDC2) comes from the output of describe-locations. The connection ID (dxcon-XXXXXXXX) is returned when you run create-connection or shown in the console. Per the Direct Connect CLI reference, the customerRouterConfig field in describe-virtual-interfaces output contains the pre-built router configuration snippet.
Final runbook checklist
- IAM permissions confirmed for
directconnect:*actions - Physical fiber and transceiver type confirmed for chosen port speed
- Router supports 802.1Q, BGP MD5, and target MTU
- Direct Connect location selected; colo or partner contact identified
- Connection requested via wizard; resiliency level chosen
- LOA-CFA downloaded and sent to colo or partner
- Cross-connect order confirmed with colo NOC
- VIF created with correct VLAN, ASN, peer IPs, and MD5 key
- Router config downloaded and applied (Cisco/Juniper/Arista)
- BGP session verified as “Established” on router and console
- VPC route table updated; security groups allow on-premises CIDR
- End-to-end ping test passed from on-premises to VPC private IP
- Failover test scheduled (second connection or LAG)
The part of Direct Connect setup most guides skip
The technical steps for AWS Direct Connect configuration are well-documented. What’s less discussed is where teams actually lose time and money.
The LOA-CFA is the real critical path. Every guide tells you to download it. Few tell you that the colo’s cross-connect team often needs a separate work order form on top of the LOA-CFA, and that submitting the LOA-CFA alone can sit in a queue for days. Call the NOC. Confirm receipt. Get a ticket number. The engineers who finish Direct Connect setups on schedule are the ones who treat the colo relationship as an active project, not a paperwork handoff.
The second thing most teams underestimate: resiliency is not a phase-two problem. Retrofitting a second connection after your primary is in production means coordinating another LOA-CFA, another cross-connect order, another BGP session, and potentially a maintenance window to update route policies. Do it in parallel with the first connection. The AWS Resiliency Toolkit exists specifically to guide this decision before you order, not after.
Finally, the router configuration download from AWS is a starting point, not a finished config. It gives you the neighbor statement and VLAN encapsulation. It does not give you the right MTU for your specific VPC workload, the correct route-map to filter what you advertise, or the BFD timers your failover design requires. Treat it as a template and build from there.
Production-grade Direct Connect without the trial and error
Setting up Direct Connect correctly the first time requires coordinating physical infrastructure, AWS configuration, and router policy simultaneously. IT-Magic, an AWS Advanced Tier Partner with 700+ completed migration projects, handles the full lifecycle: infrastructure audit, Direct Connect provisioning, resiliency design across multiple locations, and 24/7 post-deployment support. For teams in eCommerce and fintech where a misconfigured BGP session or a missed failover test translates directly into downtime, that execution depth matters.
To get an accurate scoping estimate, bring your current bandwidth requirements, target Direct Connect location, and VPC architecture to the first conversation. IT-Magic’s team will map the right connection type, resiliency level, and router configuration to your environment. Start with a free infrastructure audit and get a clear picture of what your Direct Connect deployment should look like before you order the first port.
Sources
- Getting started with AWS Direct Connect
- Direct Connect user guide (pdf)
- Set up a dedicated connection in Direct Connect | AWS re:Post
FAQ
What is the minimum time to complete an AWS Direct Connect setup?
The fastest path is roughly 3–5 business days: a few hours for AWS to issue the LOA-CFA, then 24–48 hours for an expedited colo cross-connect, followed by same-day BGP establishment once the router config is applied. Most deployments take 1–3 weeks when factoring in standard colo lead times.
What is the difference between a private VIF and a transit VIF?
A private VIF connects your on-premises network to a single VPC via a virtual private gateway or Direct Connect gateway. A transit VIF connects through a Direct Connect gateway to an AWS Transit Gateway, giving you access to multiple VPCs and regions from a single VIF.
Do you need a dedicated connection or will a hosted connection work?
Use a dedicated connection when you need sustained throughput above 1 Gbps, want MACsec encryption, or require full control over VLANs and port configuration. A hosted connection through an APN partner is sufficient for lower bandwidth needs and faster provisioning.
What causes BGP to stay in “Active” state after configuration?
The most common causes are an MD5 key mismatch between the router and the VIF settings, incorrect peer IP addresses, or a VLAN ID mismatch preventing the subinterface from coming up. Verify all three values in the console VIF details and compare them character-for-character against your router config.
How does AWS Direct Connect pricing compare to internet egress?
Direct Connect charges port-hours plus a per-GB data transfer rate that is lower than standard internet egress pricing for most AWS regions. For workloads with consistent high-volume outbound data transfer, the port-hour cost is typically offset by the reduced data transfer rate at scale.