TL;DR:
- Migrating to Amazon Aurora involves moving an existing relational database to AWS’s cloud engine for better performance and resilience. Proper preparation, including compatibility checks and sizing DMS instances, is crucial to ensure a smooth and low-downtime migration process. Testing in staging environments helps identify issues early and reduces risks during the actual cutover.
Migrating to Amazon Aurora is defined as the process of moving an existing relational database, typically MySQL or PostgreSQL, to AWS’s cloud-native Aurora engine for higher throughput, built-in replication, and managed failover. The two primary tools for this process are AWS Database Migration Service (AWS DMS) and the Aurora console’s native snapshot restore features. Teams that follow proven migration practices consistently report fewer cutover failures and shorter downtime windows. This guide walks through prerequisites, engine-specific steps, downtime reduction strategies, and troubleshooting for both MySQL and PostgreSQL workloads.
What prerequisites and tools are required to migrate to Amazon Aurora?
Every successful Aurora database migration starts with compatibility verification. Aurora supports two engine modes: Aurora MySQL (compatible with MySQL 5.7 and 8.0) and Aurora PostgreSQL (compatible with PostgreSQL 12 through 16). Knowing your source engine version determines which migration path and which AWS DMS task type you can use.
Network and security requirements
Your source database and the Aurora target must share network access. The standard setup places both inside the same Amazon VPC or connects them through VPC peering. You also need a dedicated replication user on the source database with the correct privileges: REPLICATION SLAVE and REPLICATION CLIENT for MySQL, and rds_replication for PostgreSQL. Missing either privilege causes AWS DMS tasks to fail before data moves.
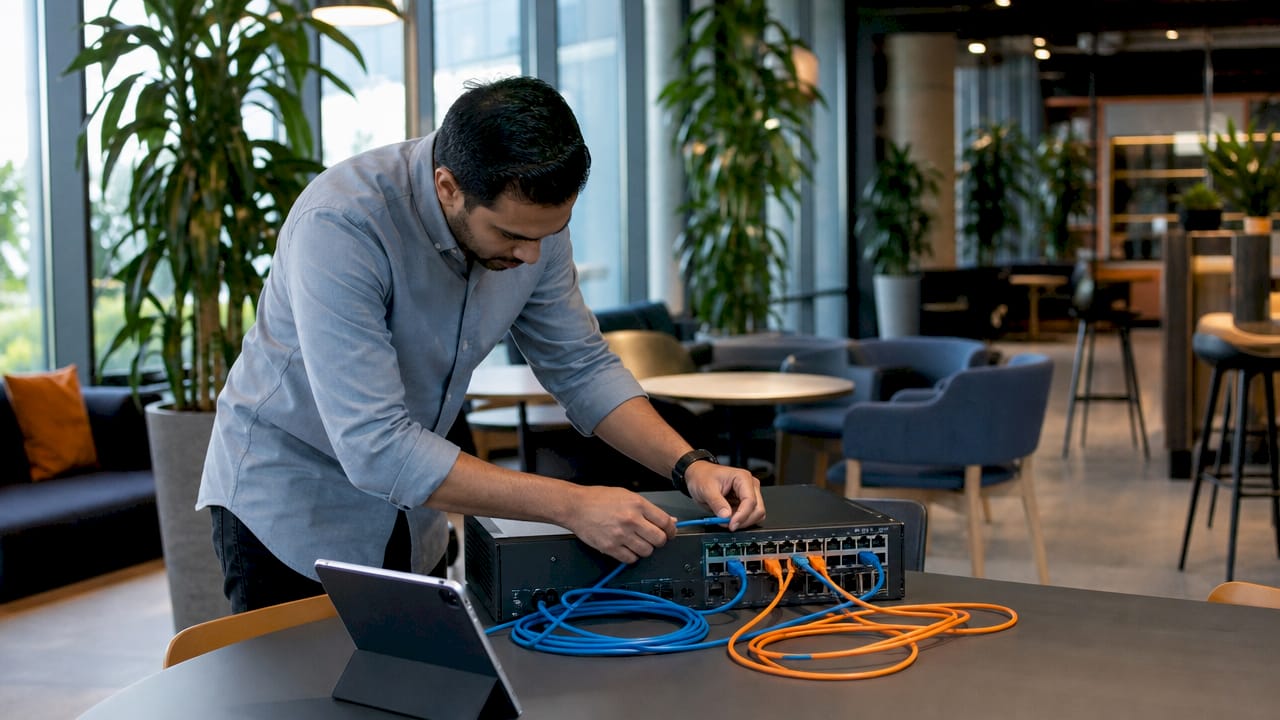
Core migration tools
AWS DMS supports three task types: full load, full load plus change data capture (CDC), and CDC-only. Full load copies all existing data. CDC captures ongoing changes after the initial load. Combining both gives you a live sync that keeps the target current while you prepare for cutover. AWS DMS also offers a serverless homogeneous migration option that removes the need for manual scripting when source and target engines match.
Prerequisite comparison by engine and migration type
| Engine | Supported task types | Key privilege required | Binary log / WAL setting |
|---|---|---|---|
| MySQL 5.7 / 8.0 | Full load, Full + CDC, CDC-only | REPLICATION SLAVE, CLIENT | binlog_format = ROW |
| PostgreSQL 12–16 | Full load, Full + CDC, CDC-only | rds_replication role | wal_level = logical |
| Aurora MySQL (target) | Receives all task types | N/A | N/A |
| Aurora PostgreSQL (target) | Receives all task types | N/A | N/A |
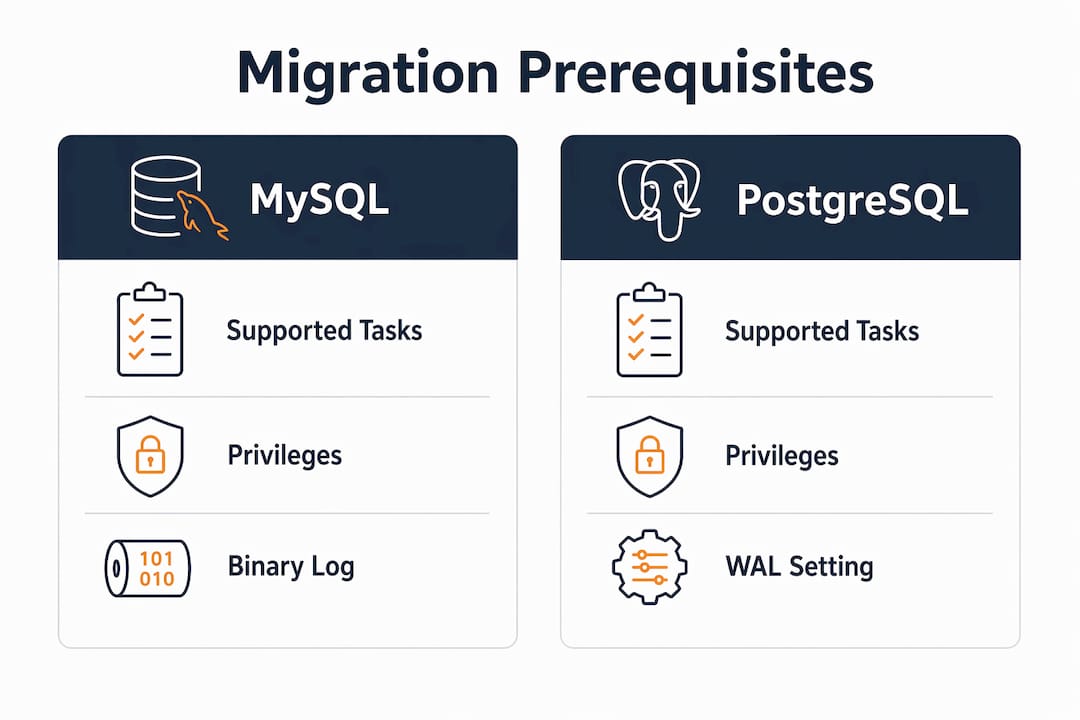
Before creating any DMS task, confirm that binary logging is enabled on MySQL sources and that wal_level is set to logical on PostgreSQL sources. Both settings are off by default on self-managed instances.
How do you perform a step-by-step migration to Aurora MySQL?
MySQL migrations to Aurora are the most common path, and AWS DMS handles them well when the source is configured correctly. The choice between full load and CDC depends on your tolerance for downtime. Full load alone requires a maintenance window. Full load plus CDC lets you run the migration while production traffic continues.
Step-by-step MySQL migration process
- Prepare the source database. Set
binlog_format = ROWandbinlog_retention_hoursto at least 24. Create a replication user with REPLICATION SLAVE and REPLICATION CLIENT privileges. - Create the Aurora MySQL cluster. Use the Aurora console or AWS CLI to provision the target cluster. Match the engine version to your source MySQL version.
- Create a DMS replication instance. Select an instance class based on your database size and transaction volume. A c5.large handles most workloads under 100 GB; larger databases need c5.xlarge or higher.
- Define source and target endpoints. Point the source endpoint at your MySQL host and the target endpoint at the Aurora cluster writer endpoint.
- Create and start the DMS task. Choose “Migrate existing data and replicate ongoing changes” for a live migration. Enable validation to catch row-count mismatches automatically.
- Monitor replication lag. Watch the CDCLatencySource and CDCLatencyTarget metrics in Amazon CloudWatch. Both should drop to near zero before cutover.
- Perform cutover. Stop writes to the source, confirm lag reaches zero, update your application’s connection string to the Aurora endpoint, and resume traffic.
Auditing GTID versus binary log replication methods is critical when migrating from MySQL 8.0. GTID mode and traditional binary log mode require different DMS configurations, and mixing them causes data consistency errors after cutover.
Pro Tip: Size your DMS replication instance generously at the start. Undersized replication instances cause task slowdowns and failures under load. It costs less to right-size upfront than to troubleshoot a stalled migration in production.
What are the recommended steps for migrating PostgreSQL databases to Aurora?
PostgreSQL migrations to Aurora require more planning than MySQL migrations. The core challenge is that Aurora PostgreSQL does not expose its internal Log Sequence Number (LSN) directly. That gap forces a workaround using a temporary RDS instance.
The snapshot-and-restore seed method
The seed method works by taking a snapshot of your source RDS PostgreSQL instance, restoring it into a new Aurora PostgreSQL cluster, and then using logical replication to sync changes that occurred after the snapshot. This approach avoids copying the entire dataset over the network twice.
To extract a valid seed LSN, restore a temporary RDS PostgreSQL instance from the same snapshot you used to seed the Aurora cluster. Query pg_current_wal_lsn() on that temporary instance to get the LSN. Aurora cannot provide this value directly, so the temporary instance acts as a proxy.
Step-by-step PostgreSQL migration process
- Enable logical replication on the source. Set
rds.logical_replication = 1in the parameter group. This setswal_leveltologicalautomatically. - Take a snapshot of the source RDS instance. Use the RDS console or AWS CLI. Record the snapshot creation time.
- Restore the snapshot into Aurora PostgreSQL. This seeds the Aurora cluster with a consistent data copy.
- Restore the same snapshot into a temporary RDS instance. Query
pg_current_wal_lsn()to extract the seed LSN. Record this value. - Create a replication slot on the source. Use
pg_create_logical_replication_slot()with thepgoutputplugin. - Configure the subscriber on Aurora. Create a subscription pointing to the source, specifying the seed LSN as the replication start point. This tells Aurora where to begin consuming WAL changes.
- Monitor replication lag. Use
pg_stat_replicationon the source to confirm the Aurora subscriber is keeping up. - Cutover. Stop writes to the source, confirm the subscriber has consumed all WAL, update the connection string, and drop the replication slot.
LSN divergence is the main failure mode in PostgreSQL migrations. If the seed LSN does not align with the WAL position on the source, Aurora will either skip rows or attempt to replay already-applied changes. Both outcomes corrupt the target.
Pro Tip: Run the full PostgreSQL migration process in a staging environment before touching production. Staging environment testing catches LSN mismatches, privilege gaps, and parameter group errors before they cost you a production outage.
PostgreSQL migration method comparison
| Method | Downtime required | Complexity | Best for |
|---|---|---|---|
| Snapshot restore only | Yes (maintenance window) | Low | Small databases, scheduled windows |
| Seeded logical replication | Near-zero | High | Large databases, production traffic |
| AWS DMS CDC-only | Near-zero | Medium | Existing snapshots, DMS-managed sync |
How do you minimize downtime during an Aurora migration?
Three primary methods exist for live migrations with minimal downtime: Aurora read replicas, snapshot restore with ongoing replication, and continuous data sync using AWS DMS. Each trades complexity for speed differently.
Aurora read replicas work only when the source is already an RDS instance. You promote the replica to an Aurora cluster, which gives you near-instant cutover. Snapshot restore with replication suits larger datasets where network transfer time matters. AWS DMS continuous sync fits heterogeneous sources or situations where you need fine-grained control over the replication pipeline.
Testing your chosen method in a staging environment before cutover is non-negotiable. A guide to minimizing AWS downtime covers the full range of techniques, but the core principle is the same: validate the entire process before you touch production.
Common causes of unexpected downtime and how to address them:
- Replication lag spike at cutover. Cause: high write volume on source. Fix: throttle writes or schedule cutover during low-traffic periods.
- Connection string not updated. Cause: application config not changed before traffic resumes. Fix: use a DNS CNAME that you can flip without redeploying code.
- DMS task failure mid-migration. Cause: undersized replication instance or network interruption. Fix: right-size the instance and use Amazon PrivateLink for stable connectivity.
- Schema incompatibilities. Cause: source uses features not supported in Aurora. Fix: run AWS Schema Conversion Tool before starting the DMS task.
- Replication slot not dropped after cutover. Cause: forgotten cleanup step. Fix: include slot deletion in your cutover runbook.
Troubleshooting common migration challenges
Network connectivity is the most frequent cause of DMS task failures in high-load or on-premises migrations. Deploying dedicated DMS EC2 AMIs and routing traffic through Amazon PrivateLink resolves most connectivity failures. PrivateLink keeps traffic on the AWS backbone and eliminates public internet exposure, which also satisfies compliance requirements for fintech and healthcare workloads.
Replication lag that does not decrease after the initial full load usually points to an undersized DMS replication instance. Check CloudWatch metrics for CPU and memory on the replication instance. If either consistently exceeds 80%, scale up before the lag compounds into a data backlog that delays cutover by hours.
Configuration errors are harder to spot. The most common ones are mismatched character sets between source and target, missing primary keys on source tables (CDC requires primary keys), and incorrect endpoint SSL settings. Run the DMS pre-migration assessment before starting any task. It flags these issues without moving any data.
Pro Tip: Always conduct a dry run with a non-critical database before migrating your primary workload. Dry runs expose configuration and sizing errors that only appear under real replication conditions. Teams that skip dry runs spend significantly more time in post-migration firefighting.
For enterprise application scaling after migration, the Aurora cluster configuration matters as much as the migration itself. Set up Aurora Auto Scaling for read replicas and configure Performance Insights from day one to catch query regressions early.
Key Takeaways
A successful Aurora migration requires engine-specific preparation, correctly sized AWS DMS instances, and validated replication alignment before any production cutover.
| Point | Details |
|---|---|
| Verify engine compatibility first | Confirm your MySQL or PostgreSQL version maps to a supported Aurora engine mode before creating any DMS task. |
| Size DMS instances correctly | Undersized replication instances cause task failures; match instance class to database volume and transaction rate. |
| Extract seed LSN for PostgreSQL | Use a temporary RDS instance from the same snapshot to get the LSN; Aurora does not expose it directly. |
| Test in staging before production | Run the full migration process in a non-production environment to catch privilege gaps and LSN mismatches early. |
| Use PrivateLink for high-load sources | Amazon PrivateLink eliminates network bottlenecks and satisfies compliance requirements for sensitive workloads. |
What I’ve learned from real Aurora migrations
The teams that struggle most with Aurora migrations are not the ones with the most complex databases. They are the ones that underestimate preparation time. I have seen organizations spend weeks on the actual migration and less than a day on prerequisites, then wonder why their DMS tasks keep failing.
The PostgreSQL LSN problem catches almost everyone off guard the first time. The documentation describes the workaround clearly, but the implication is easy to miss: you are essentially running three database instances simultaneously during the migration window. That has cost implications and resource planning requirements that need to be in the project plan from the start.
My strongest recommendation is to treat the cutover as a separate project from the migration itself. The migration gets data to Aurora. The cutover transfers production traffic. They require different skills, different checklists, and different rollback plans. Teams that conflate the two end up making cutover decisions under pressure with incomplete information.
Post-migration monitoring is where most teams also underinvest. Aurora’s Performance Insights and CloudWatch metrics tell you within minutes if query patterns have changed after cutover. Set up dashboards before you flip traffic, not after. The first 48 hours post-cutover are when regressions surface, and you want to catch them before users do.
— Oleksandr
IT-Magic’s approach to Aurora database migrations
Migrating a production database to Aurora carries real risk. IT-Magic removes that risk through full-lifecycle ownership: infrastructure audit, migration execution, and post-migration performance tuning.
As an AWS Advanced Tier Partner with 700+ completed projects, IT-Magic has handled Aurora migrations across eCommerce and fintech environments where downtime translates directly into lost revenue. The team applies the right migration strategy, whether rehost, replatform, or refactor, based on your database size, traffic profile, and compliance requirements. If you want a predictable, secure path to Aurora without adding burden to your internal team, IT-Magic’s AWS migration services cover everything from the first audit to the final cutover. You can also review how to avoid migration pitfalls before your project kicks off.
FAQ
What is the fastest way to migrate an RDS MySQL database to Aurora?
The fastest method is creating an Aurora read replica from an existing RDS MySQL instance and then promoting it. This approach requires no data transfer over the network and typically completes promotion in minutes.
How do I handle LSN divergence when migrating PostgreSQL to Aurora?
Restore a temporary RDS instance from the same snapshot used to seed Aurora, then query pg_current_wal_lsn() to get the correct start point. LSN alignment between the source WAL and the Aurora subscriber prevents row skips and duplicate replays.
What AWS DMS task type should I use for a live migration?
Use “Migrate existing data and replicate ongoing changes,” which combines full load with CDC. This keeps the Aurora target in sync with the source while you prepare for cutover, minimizing the downtime window to seconds.
Does AWS DMS support migrating from MySQL 8.0 to Aurora?
Yes, but you must audit GTID versus binary log settings on the source before creating the DMS task. Mismatched replication modes cause data consistency errors that are difficult to detect until after cutover.
How do I test my Aurora migration before going to production?
Run the complete migration process against a non-production copy of your database. Staging environment testing validates replication settings, instance sizing, and cutover procedures without risking production data.